Upgrading your door security with an electric bolt lock is a smart move—especially if you want powerful holding force and manual key access all in one. Whether you're a homeowner or small business owner, electric bolt locks provide a sleek, effective way to secure doors while still allowing emergency access when needed.
In this guide, we’ll walk you through the step-by-step installation of a bolt-style electric lock with a key cylinder—ideal for beginners taking on a DIY security project.
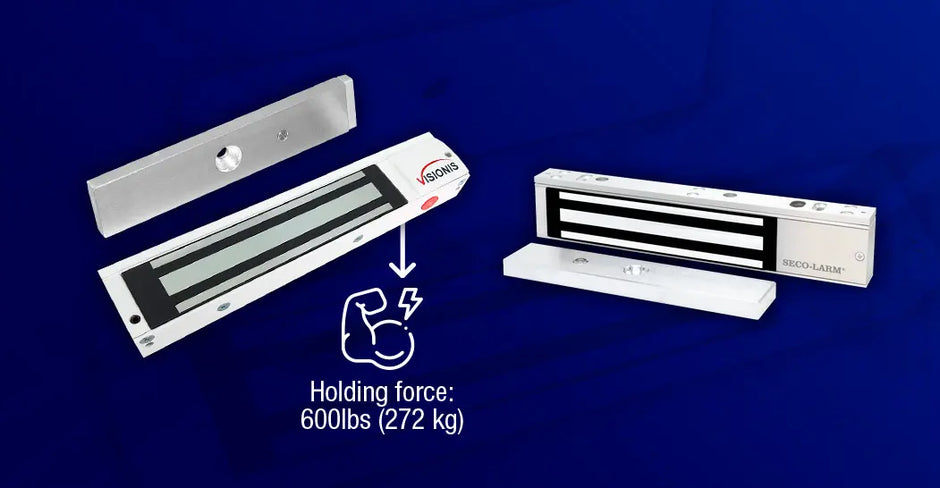
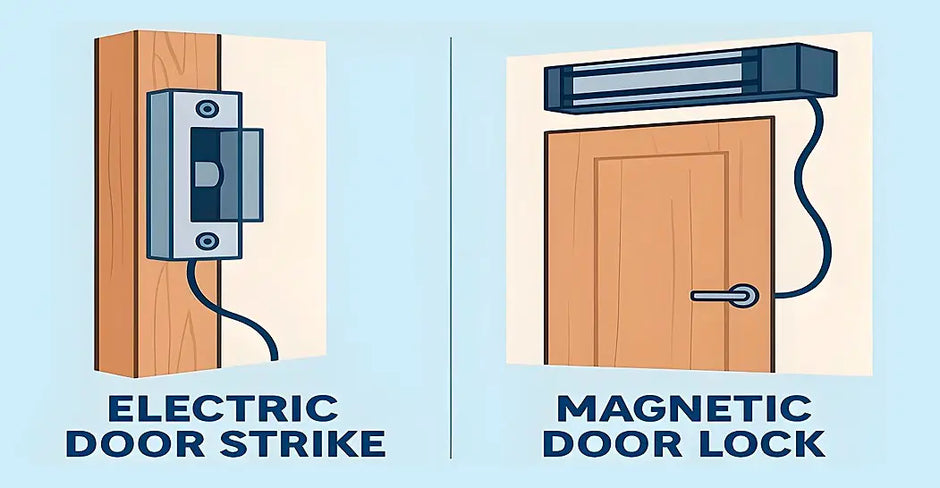
Why Choose an Electric Bolt Lock with a Key Cylinder?
Electric bolt locks (also called drop bolt locks) offer several advantages:
- Strong door security with powerful holding force
- Clean, minimal look compared to bulky magnetic locks
- Fail-secure operation, locking the door when power is lost
- Built-in delay timer for automatic relocking
-
Manual override key for access during emergencies or power failure
🔑 What’s the Purpose of the Key Cylinder?
The key cylinder is your manual backup. In case of a power failure or electronic malfunction, you can use a physical key to unlock the door. This is especially useful in situations where access is critical—like home offices, private rooms, or backroom storage.
Even if the electric function fails, you're never locked out.

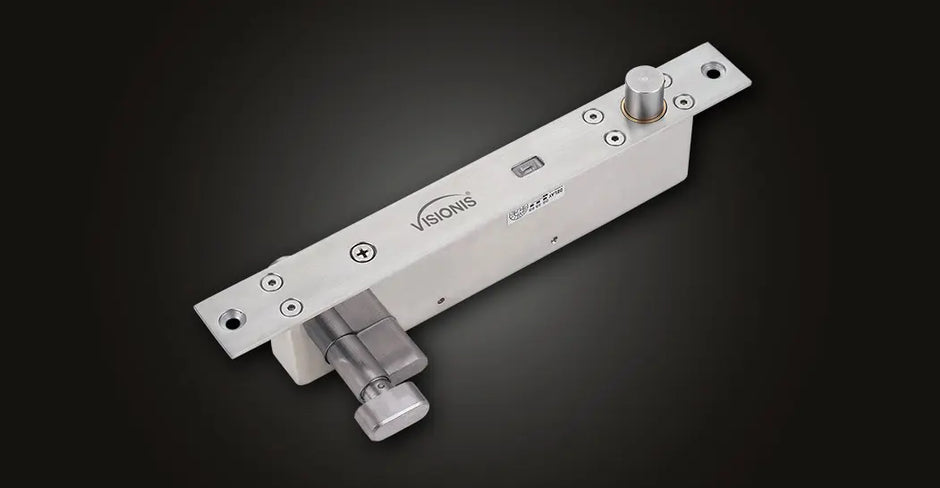
Why the VIS-DP103WCY-FSE-LED?
A great example of this type of lock is the VIS-DP103WCY-FSE-LED, which offers:
- 2600 lbs (1200 Kg) of holding force
- Key cylinder for manual unlocking
- Adjustable time delay (0, 3, or 6 seconds)
- LED status indicator
- Fail-secure design (with power it unlocks)
-
Dual voltage support (12VDC / 24VDC)
🚫 Important: This model is not waterproof and should only be used indoors for doors like offices, internal rooms, or secured storage.
🛒 Buy the VIS-DP103WCY-FSE-LED Bolt Lock from FPC-Security
What You’ll Need for the Installation
 Tools Checklist:
- Electric drill
- Circular saw
- Drill bits (wood or metal, depending on your door)
- Measuring tape or ruler
- Phillips screwdriver
- Pencil or marker
- Chisel (if necessary for fitting)
Typical Components Included:
- Lock body with key cylinder
- Counter plate
- Wood screws, metal screws for metric threw
- Extension plates or spacers
- Cylinder fixing screws
- Keys
- Cylinder trim and fixing plates
- Template for drilling
- Manual

⚠️ Safety Tips:
- Always turn off power before wiring
- Use safety glasses during drilling
-
Double-check alignment before securing parts.
Prefer to Watch Instead of Read?
You can follow the installation process step-by-step in our video below:
Step-by-Step Installation Guide
This process is straightforward even for beginners. Follow these steps to install your electric bolt lock.
You can find manuals and datasheets of all our products in the Document Library.

(Click the image to view a larger version)
Installation Hole Size:
252 mm (L) × 31 mm (W) — 9.92 in. (L) × 1.22 in. (W)
Depth of the hole must be at least 49 mm (1.93 in.)
Decorative Plate Size:
255 mm (L) × 35 mm (W) × 0.6 mm (H)
10.04 in. (L) × 1.38 in. (W) × 0.02 in. (H)
Lock Face Plate Size:
250 mm (L) × 30 mm (W) × 3 mm (H)
9.84 in. (L) × 1.18 in. (W) × 0.12 in. (H)

Step 1: Mark the Cylinder Position
Start by marking with a pencil where the key cylinder will be installed on the door leaf (the moving part of the door). Once marked, drill the necessary holes at these locations to prepare for mounting the cylinder.

Step 2: Attach the Template and Mark Drill Points
Use the included paper template to mark all required holes for the lock body and bolt on your door and door frame. This ensures proper alignment for smooth locking.

Step 3: Drill and Cut the Holes
Use your drill to make pilot holes at each of the marked positions on the door and frame. Then, use a circular saw to cut out the opening for the lock body and bolt housing. This allows for cleaner, more precise cuts—especially important if you’re working with solid wood or metal doors.

Step 4: Insert Extension Plates
Place the extension plates into the holes for added stability and strength. These support the main bolt housing.

Step 5: Secure the Strike Plate
Fasten the strike plate (on the frame side) using the provided screws. Make sure it aligns with the bolt when the door closes. Also insert the key cylinder.

Step 6: Attach the Decorative Plate
Place the decorative plate over the lock body and fasten it with screws to give a clean, finished appearance.

Step 7: Secure Cylinder Screws
Insert and tighten the screws into the cylinder holes on both sides of the door. Follow this with the cylinders fixing plates for reinforcement. Cover the plates with the cylinder trims.
At this point, the lock body is installed!

Step 8: Mark and Drill for the Counterplate
On the door frame (strike side), use the included paper template to mark the position for the counterplate—this is where the bolt will lock into when extended.
After marking, drill a central hole to accommodate the bolt. The goal is to create a clear, centered opening so the bolt can fully extend into the frame when powered. If needed, widen or clean the hole using a chisel or circular saw for a snug fit.
🛠️ Tip: Use a level to make sure the template is properly aligned with the bolt position on the door leaf.

Step 9: Install the Stainless Steel Counter Plate
Place the stainless steel counter plate over the drilled hole in the frame. Align it precisely over the bolt cavity and fasten it securely using screws. This will guide the bolt into place each time the door locks.
Proper alignment here is essential—if the strike plate isn’t centered, the bolt may jam or fail to engage.

Once secured, the installation is complete!

Setting Up the Timer Delay Feature
This lock comes with a DIP switch labeled "DELAY SETTING", which allows you to choose how long the door remains unlocked before auto-locking again.
To adjust:
- 0S: Locks instantly
-
3S: Delays locking for 3 seconds
-
6S: Delays locking for 6 seconds
🛠️ Flip the corresponding switch using a small tool (like a flat screwdriver or pen tip). This is especially helpful when the door is used frequently and you don’t want it locking too quickly.

Tips & Mistakes
Tips for Success:
- Always use the included template for perfect alignment.
- Use a level before mounting the strike plate.
- Test the lock with power before final screw tightening.
Common Mistakes:
- Misaligned holes: This prevents the bolt from sliding into place.
- Incorrect voltage: This model supports 12VDC and 24VDC—don’t exceed it.
- Loose wiring: Can cause the bolt to fail to engage or retract.
Troubleshooting
Why isn’t the drop bolt extending after I wire it up?
Check that you're using the correct voltage (12VDC or 24VDC) and that your polarity matches the lock's wiring specs. Also ensure the DIP switches aren’t in a neutral or disabled state.
The bolt won’t retract when the door unlocks. What’s the issue?
This is often due to poor alignment. Open the door and test manually—if the bolt hits the strike plate or doesn't retract cleanly, adjust the strike position or hole depth.
The LED indicator isn’t turning on—how do I fix it?
The LED may be improperly wired, or the delay setting may need to activate first. Double-check wiring to the LED terminal and ensure voltage is being delivered.
My electric drop bolt isn’t responding at all—is it broken?
Not necessarily. Use a multimeter to test power at the lock terminals. Also check for loose wires, low voltage, or tripped fuses on your power supply.
Final Thoughts
An electric bolt lock with key cylinder is a fantastic way to improve door security—especially when you need both electronic control and manual backup. These locks are best for indoor use only, but they offer professional-grade protection with DIY simplicity.
Want a model with serious holding power and easy setup?
🛒 Get the VIS-DP103WCY-FSE-LED Electric Bolt Lock on FPC-Security