Whether you're looking for standard push to exit buttons, specialized handicap door buttons, or versatile door release solutions, this comprehensive guide covers everything dealers need to know.
From request to exit button installation to troubleshooting door push button systems, we'll help you select the right products for your clients' access control needs.
What Is a Push to Exit Button?
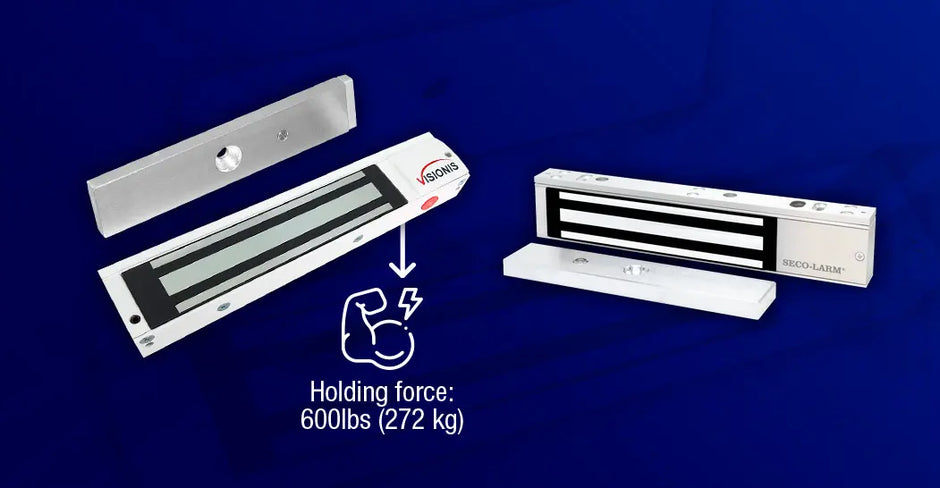
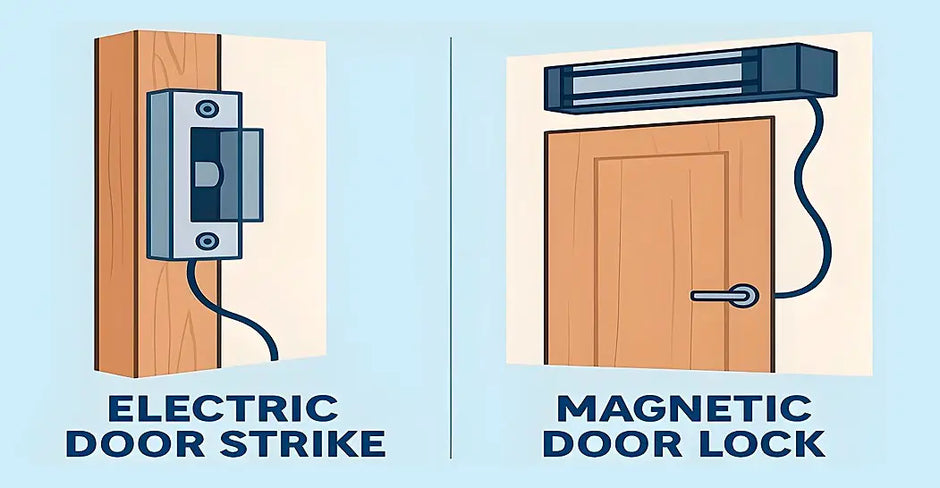
A push to exit button is a device used in access control systems to allow authorized exit from a secured area. When pressed, it signals the system to unlock the door, often disengaging an electric strike or magnetic lock.
These buttons are crucial for safety, convenience, and code compliance, especially in commercial and institutional buildings.

Unlike a handicap door button or ADA push button that opens doors for accessibility, a push to exit button is specifically designed to release a locked door.
You'll find them in offices, retail stores, schools, warehouses, and other facilities where controlled access is essential.
What Is the Push to Exit Button For?
Push to exit buttons serve several key functions:
- Allow free egress in areas secured by access control systems
- Ensure ADA compliance by providing accessible exit options
- Meet fire and building codes that require manual exit options
- Provide quick and easy exit during power outages or emergencies
These buttons are often paired with motion sensors or time-delay features for additional safety and flexibility.
Types of Push to Exit Buttons: Choosing the Right Solution for Your Clients
Choosing the right push to exit button depends on your client’s specific needs. Here are the main types:
Basic Types

Standard Push Buttons
- Simple mechanical buttons that require physical pressure
- Often illuminated for visibility in dark areas
- Available in various sizes and mounting options
Touch-Sensitive Buttons
- Activate with minimal contact
- No moving parts, making them more durable
- Often feature LED indicators
No-Touch/Touchless Buttons
- Work with proximity sensors
- Activated by waving or holding hand near the sensor
- Increasingly popular for hygiene reasons, especially post-COVID
Emergency Exit Buttons
- Larger, often red buttons
- Sometimes covered with protective cases to prevent accidental activation
- May include alarm features
By Installation Method

Surface-Mounted
- Installed on the wall surface
- Easier to install but more visible
Flush-Mounted
- Recessed into the wall
- More aesthetically pleasing but requires more installation work
Narrow-Style
- Slim design for door frames or areas with limited space
By Application

ADA-Compliant/Handicap Buttons
- Larger surface area for easier activation
- Usually marked with wheelchair symbol
- Mounted at accessible heights
Request to Exit (REX) Buttons
- Specifically designed for secure areas
- Often integrated with access control systems
- May include delay features
Weatherproof Buttons
- Designed for outdoor use
- Sealed against moisture and dust
- Often made of stainless steel or other corrosion-resistant materials
Pneumatic Buttons
- Use air pressure rather than electrical circuits
- Useful in hazardous environments where electrical sparks could be dangerous
Vandal-Resistant Buttons
- Reinforced construction
- Often made of metal rather than plastic
- Designed to withstand tampering or damage
Comparison Table: Visionis vs Seco-Larm Push to Exit Buttons
Below is a comparison template showcasing key features for popular push to exit button models from Visionis and Seco-Larm. This can help you quickly evaluate which product best suits your project requirements:
| Model | Mounting Type | Touch Type | Weatherproof | Delay Timer Available |
| VIS-7100 | Flush-Mount | Push | No | Yes |
| VIS-7001 | Flush-Mount | Push | Yes | No |
| VIS-7008 | Narrow-Style | Push | Yes | No |
| VIS-7013 | Flush-Mount | No-Touch | No | Yes |
| VIS-7026 | Surface-Mount | Touch | No | No |
| VIS-7039 | Surface-Mount | Push | No | No |
| VIS-7043 | Surface-Mount | Push | No | No |
| SD-7201GC-PEQ | Flush-Mount | Push | Yes | No |
| SD-7103GC-PEQ | Narrow-Style | Push | Yes | No |
| SD-7257-SSTQ | Flush-Mount | Push | Yes | Yes |
| SD-927PKC-NEQ | Flush-Mount | No-Touch | No | Yes |
| SS-075C-PEQ | Surface-Mount | Push | No | No |
Request to Exit Button with Timer: What Dealers Should Know
A push to exit button with a built-in timer can delay unlocking the door for a set number of seconds after the button is pressed. This is ideal for:
- High-security environments where controlled exit is necessary
- Time-sensitive operations needing a slight delay before door release
- Ensuring ADA compliance with adjustable timing for door auto-openers
These devices often include visual/auditory cues during the countdown and can be programmed using dip switches or external controllers.
How to Wire a Push to Exit Button
Wiring requirements can vary depending on the specific model of push to exit button you're using.
Some may include extra features like timers, LED indicators, or audible alerts, which require additional connections. Maybe this collection of wiring diagrams can help with your installation.
Basic Wiring Overview
Wiring a push to exit button properly is crucial for ensuring reliable operation within an access control system. Most push to exit buttons use dry contact relays. This means they work like a switch. They can open or close a circuit without providing power themselves.

This makes them compatible with a wide range of access control hardware.
Push to exit buttons typically offer two types of contact outputs:
-
Normally Open (NO). NO contacts complete the circuit when pressed, which is the most common setup for triggering door release.
- Normally Closed (NC). NC contacts break the circuit when the button is pressed, useful in fail-safe designs where power must be interrupted to unlock a door.
Push to exit buttons usually connect directly to an access control panel or locking system with low-voltage wiring. For standard applications, most systems use Normally Open (NO) contacts.
With Magnetic Locks: Button interrupts power to the maglock.

Safety Tips
- Always turn off the power before starting the installation
- Use appropriate gauge wiring for long cable runs
- Label the wires clearly to make troubleshooting easier
How to Install a Push to Exit Button
We’ve created a helpful video demonstrating the installation process of one of our most popular request to exit buttons. The installation process shown in this video is for connecting this device to an access control panel.
This walkthrough can guide both new and experienced installers through key steps. You can find it—and many more instructional videos—in our dedicated YouTube playlist.
Best Practices
- Install near the door handle or in a clear exit path
- For outdoor installs, use weatherproof models with sealed enclosures
- Ensure the button is mounted at ADA-compliant height (typically 34–48 inches from the floor)
- Use tamper-resistant screws or covers in public or vandal-prone areas
- Test the button functionality regularly as part of routine system maintenance
Choosing the Right Door Release Button for Each Project
As an access control dealer, selecting the right push to exit button starts with understanding your client’s priorities. Use the questions below to identify the most suitable option for their specific application.
1. Will the button be installed indoors or outdoors?
What environmental conditions (moisture, temperature, exposure) need to be considered?
2. Does the location require ADA compliance?
Is this for a school, hospital, or public building that must meet accessibility standards?
3. What type of material is preferred or required?
Should the button be made of durable metal for longevity or plastic for cost savings?
4. What is the available budget for this part of the project?
Are you looking for a cost-effective standard model or a premium solution?
5. How much foot traffic will the button be exposed to?
Will this be a high-traffic area that requires vandal-resistant or heavy-duty options?
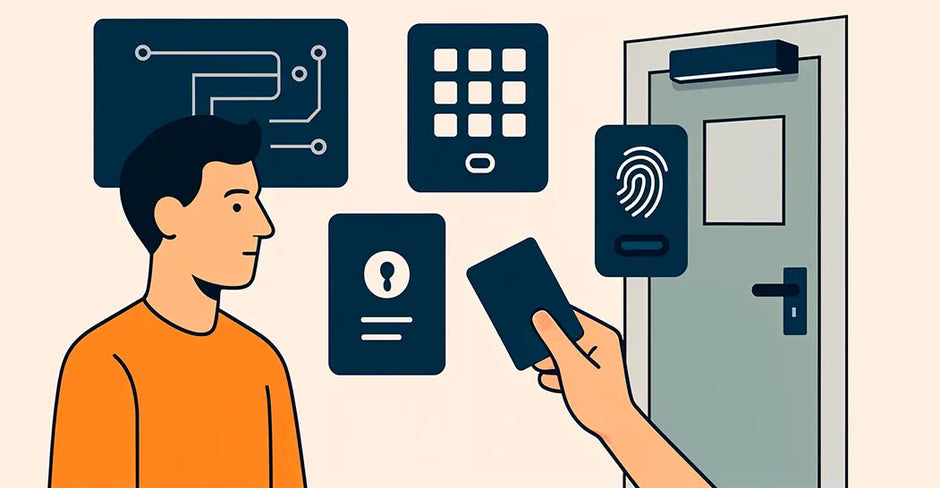
6. What is the preferred activation type?
Does the client prefer a mechanical push button, a touch-sensitive button, or a no-touch sensor for hygiene or ease of use?
7. Is visual or audible feedback important for the user?
Does the client need the button to include an LED indicator or sound confirmation upon activation?
8. Should the button include a time delay function?
Is there a need to delay door release for safety, compliance, or operational flow?
Troubleshooting Common Door Release Button Problems
Even with proper installation, issues may arise over time with request to exit buttons. Here are some common problems and quick troubleshooting tips:
Button Not Releasing the Door:
- Check wiring connections to ensure continuity and proper contact (NO or NC).
- Confirm that power is reaching the lock or control board.
- Test the button using a multimeter to verify functionality.
No Response from Access Control System:
- Verify integration with the controller—some systems may require programming.
- Make sure the access control panel is powered and functioning.
LED or Timer Not Working:
- Inspect auxiliary wiring for timers or indicator LEDs.
- Ensure jumper settings or DIP switches are configured correctly (refer to product manual).
Frequent False Activations (No-Touch Buttons):
- Reposition the sensor or adjust sensitivity settings.
- Avoid placing near direct sunlight, vents, or reflective surfaces.
Delayed or No Response After Pressing:
- Ensure the time delay function (if applicable) is properly programmed.
- Check if the output relay is sticking or malfunctioning.

Frequently Asked Questions from Dealers
Q: Are exit buttons compatible with third-party panels?
A: Most use standard NO/NC relay contacts, making them highly compatible.
Q: Do these buttons work during power outages?
A: When paired with fail-safe or fail-secure devices and battery backup systems, they continue to function.
Q: Can one push to exit button control multiple doors?
A: Yes, one push to exit button can be configured to control multiple doors, but doing so requires additional relays or access control logic modules. This setup is often used in mantrap or vestibule entry systems.
One button controls the unlocking of two or more doors. The doors can unlock in order or at the same time, based on security needs. Proper planning and coordination with the access control panel are essential for this type of installation.
Q: Are no-touch exit buttons more prone to false triggers?
A: Quality models with infrared sensors are designed to minimize false triggers. Installation height and environment play a key role.
Q: How do I know which push to exit button is right for my customer’s environment?
A: Start by evaluating whether the installation is indoors or outdoors, the level of physical interaction required, and whether ADA compliance is necessary. For example, a no-touch button is ideal for clean environments, while a weatherproof model is best for outdoor gates.
Final Thoughts: The Value of Reliable Door Push Buttons for Dealers
Push to exit buttons are more than accessories—they’re essential components in a safe and code-compliant access control system. Offering the right mix of features, durability, and compliance ensures your clients’ satisfaction and system reliability.
Explore our full range of Push to Exit Button Solutions and empower your next install with trusted, professional-grade equipment from FPC-Security.
All our products are backed by up to a 3-year warranty depending on the brand, a 30-day no-questions-asked return policy, and live technical support to assist you before, during, and after installation.